Roasted Garlic Sourdough Loaf
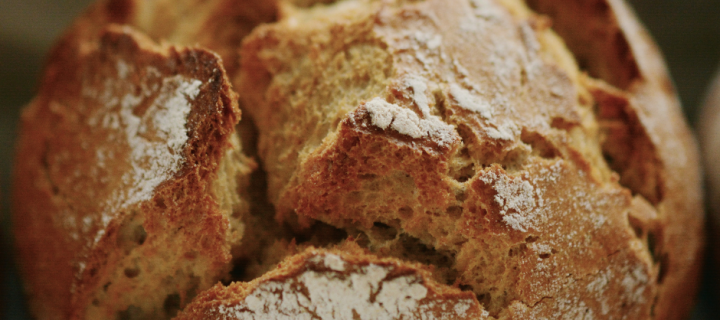


This sourdough bread starts with an active sourdough starter and the dough will cold-proof in the refrigerator for two stretches of at least 12 hours. Baking the bread in a Dutch oven traps the escaping steam from the dough, helping create the effect bakers get spraying water into commercial ovens while loaves bake, setting the crust and encouraging crispiness.
The confit garlic makes more than needed for this bread recipe, extra will be great spread on the bread afterwards and the oil is delicious all on its own to make a vinaigrette or to toss with pasta. The garlic can be prepared and stored in its oil in the refrigerator for up to a week.
Makes 2 loaves
Ingredients
- 750 g water
- 250 g sourdough starter
- 800 g bread flour
- 200 g whole wheat or rye flour
- 20 g kosher salt
- 2 teaspoons dried herbs, such as herbes de Provence
- Finely grated zest of 1 lemon
- Rice flour, for proofing baskets
Confit Garlic
Ingredients
- 4 heads garlic, cloves separated and peeled
- 2 sprigs fresh rosemary
- 1 teaspoon chile flakes (optional, if you like a little heat)
- 1 1/2 cups olive oil, more if needed
Directions
- For the confit garlic, preheat the oven to 200 F. Combine the garlic, rosemary, and chile flakes (if using) in a small shallow baking dish. Add the olive oil, which should cover the garlic cloves; if not, add more oil. Bake until the garlic is tender and lightly golden, but not browned, about 2 hours. Set aside to cool completely. When cool, use a fork to lift out 1/2 cup of the garlic cloves and put them in a small bowl; refrigerate the remaining confit garlic in its oil for other uses.
- In a large bowl, combine the water and starter, then add the bread flour and whole wheat flour. Mix until evenly combined; at this point the dough will be a bit shaggy, that’s normal. Cover and let rest for 35 minutes to autolyse (the process in which the flour absorbs the moisture). Add the salt, herbs, and lemon zest and work them into the dough until well incorporated and the dough becomes smoother. Cover and let rest for 45 minutes.
- Now begin the first round of the stretch-and-fold process: grab one side of the dough, lifting it up to gently stretch a bit and fold it up onto the top of the dough. Turn the bowl one-quarter turn and repeat this stretching and folding process. Repeat this process of turning the bowl then stretching and folding the dough two more times. Cover the bowl and let rest for 45 minutes.
- Scatter the 1/2 cup confit garlic over the dough and repeat the stretch-and-fold process, with the four one-quarter turns. Cover the bowl and let rest another 45 minutes, then repeat the stretch-and-fold process one last time. Cover the bowl and put it in the refrigerator to proof for 12 to 18 hours.
- Remove the proofed dough from the refrigerator, gently turn it out onto a lightly floured counter, and divide it in half. If you want to be precise, use a scale. Gently pre-shape your loaves by tucking the edges under, making it somewhat round. Make sure all folds/pleats are at the bottom and then cover with a cloth and let rest for 10 to 15 minutes. Meanwhile, prepare 2 proofing baskets with a heavy sprinkling of rice flour and set aside.
- To shape each loaf, flip the round over onto a lightly floured surface and gently stretch the round out to a circle of about 9 inches. Lift the left side of the circle up and fold over a little past the middle. Lift the right side of the circle up and over to about the middle, just overlapping the left side that was just folded.
- With both hands, grab the top of the dough and lift it up, away from you, then fold the top edge a few inches down over the dough, using your fingertips to press the dough edge into the layer of dough beneath it to lightly seal. Continue lifting the from the top edge and rolling the dough downward, sealing at each fold-over. With each fold, avoid putting too much pressure on the dough, fold and roll loosely, pressing gently to seal the edges.
- After the final fold with your fingers, the dough should be smooth on the outside with a firm surface. This dough will now undergo a long proof time, and needs to be shaped with enough strength to make it to the oven without spreading outward excessively.
- With the help of a bench knife, flip the shaped loaf into your proofing basket, seam-side up. Gently adjust the dough if needed, so that it is well centered in the basket. Wrap the baskets in plastic and refrigerate for at least 12 hours and up to 18 hours.
- When ready to bake, preheat a Dutch oven in the oven while it is preheating to 450 F. Cut 2 pieces of parchment paper into 12-inch rounds.
- When the oven is preheated, take one loaf out of the refrigerator and unwrap it. Lay one piece of the parchment over the basket, top with an inverted pizza peel or wooden cutting board, and flip them over together, then remove the basket with the dough now resting on the parchment. Score the top of the loaf with a “box” or “X” pattern. If using scissors, snip the dough a few times at a very shallow angle between the scissors and the dough, forming a set of ridges down the dough's center.
- Wearing heavy-duty oven mitts, carefully remove the Dutch oven from the oven. Holding the peel, carefully slide the dough-topped parchment paper into the Dutch oven, centering it as best you can. Cover with the lid and return the Dutch oven to the oven to bake for 20 minutes. Wearing the oven mitt, very carefully remove the lid from the Dutch oven and continue baking the bread for 30 minutes longer. To confirm that the bread is done, an instant-read thermometer should register around 208 degrees when inserted in the center of the loaf; bake a few minutes longer if needed.
- Carefully transfer the loaf to a wire rack to cool. Place the Dutch oven back in the oven to heat for 10 to 15 minutes before repeating the baking process for the second loaf.
